What is Standard ACL and How to Configure Standard ACLs
As the condition test in an IP packet, the Standard ACLs (Access-Lists) use only the source address. All the decisions are made on the base of the source IP address, which means that a Standard ACL (access-lists) denies or permits an entire protocol's suit. UDP, web, Telnet, and so on, and they don’t distinguish between any of the many types of IP traffic.
The default operation
of the router is to forward all packets as long as a route exists for the link
is up and for the packets. To implement the basic level of security ACL is used
for it. The large organization would want to implement the security solution.
The ACLs easiest and most
common uses are to filter unwanted packets when implementing security policies.
For example, about regulating traffic patterns you can set them up to make very
specific decisions so that they will allow only certain hosts to access web
resources on the internet while restricting others. With ACL right
combinations, the network managers arm themselves with the power to enforce any
security policy nearly they can invent.
The packet follows a few
essential rules when it is being compared with ACL.
v
In sequential order, the packet is
always compared with the access list that is with the access list's first line
it’ll always start and go to line 2 then line 3, and so on.
v
Until
the match is made, it is compared with access-list lines, on the line of access
list condition once the packet matches, no further comparisons take place and
the packet is acted upon.
v
At the access list end there is an implicit “deny” which
means that if the packet on any access-list lines doesn’t match the condition,
the packet will be discarded.
 |
| How to Configure Standard ACLs |
Router> enable
Router# configure
terminal
Enter configuration
commands, one per line. End with CNTL / Z.
Router
(config) # hostname R1
R1
(config) # interface serial 0/1/0
R1 (config-if) # ip
address 3.0.0.1 255.0.0.0
R1 (config-if) #clock
rate 64000
R1 (config-if) #keepalive
12
R1 (config-if) #no
shutdown
%LINK-5-CHANGED:
Interface Serial0/1/0, changed state to down
R1 (config-if) #exit
R1
(config) # interface fastethernet0/0
OR
R1
(config) # int fa0/0
R1 (config-if) # ip
address 192.168.1.30 255.255.255.0
R1 (config-if) #no
shutdown
 |
| Interface Status up |
R1 (config-if) #end
R1#
Router> enable
Router# configure
terminal
Enter configuration
commands, one per line. End with CNTL / Z.
Router
(config) # hostname R2
R2 (config) # interface
serial 0/1/0
R2 (config-if) # ip
address 3.0.0.2 255.0.0.0
R2 (config-if) #keepalive
12
R2 (config-if) #no
shutdown
 |
| Interface Status up |
R2 (config-if) #exit
R2
(config) # interface fastethernet0/0
OR
R2
(config) # int fa0/0
R2 (config-if) # ip
address 192.168.2.30 255.255.255.0
R2 (config-if) #no
shutdown
 |
| Interface Status up |
R2 (config-if) #end
R2#
R1# show ip route
 |
| IP Route Status |
R1#
Router R2
R2#
show ip route
 |
| IP Route Status |
R2#
Router R1
R1# configure terminal
R1
(config) # ip route 192.168.2.0 255.255.255.0 3.0.0.2
Router R2
R2# configure terminal
R2
(config) # ip route 192.168.1.0 255.255.255.0 3.0.0.1
Router R1
R1#
show ip route
 |
| IP Route Status |
R1#
Router R2
R2# show ip route
 |
| IP Route Status |
R2#
R2# configure terminal
R2 (config) # enable
password Networking
R2 (config) # line vty
0 4
R2 (config-line) #
password Ithome
R2 (config-line) #
login
Note:
on the router R2 the password is configured so that using telnet the devices
can access router R2.
R2 (config-line) # exit
R2 (config) #
R2 (config) #
access-list?
<1-99> IP
standard access list
<100-199> IP
extended access list
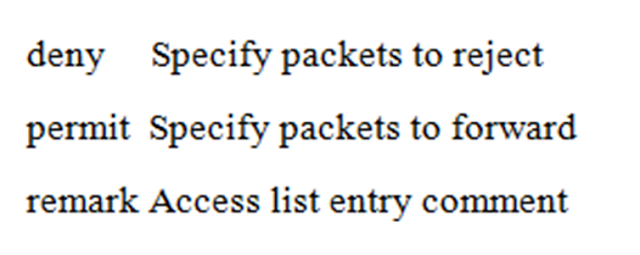
R2 (config) # access-list 12 ?
 |
| Standard Access-Lists Options |
R2 (config) #
access-list 12 deny?
 |
| Standard Access-Lists Deny Options |
R2 (config) # access-list 12 deny 3.0.0.1?
A.B.C.D Wildcard bits
R2 (config) #
access-list 12 deny 3.0.0.1 0.0.0.0
R2 (config) #
access-list 12 permit any
OR
R2 (config) #
access-list 12 deny host 3.0.0.1
R2 (config) #
access-list 12 permit any
R2 (config) #
Note: It will just deny the host 3.0.0.1 to get to
3.0.0.2 for each sort of traffic, and the wide range of various hosts is
allowed.
R2 (config) # interface
Serial 0/1/0
R2 (config-if) # ip access-group 12 in
%SYS-5-CONFIG_I: Configured from console by console
R2 (config-if) #end
R2#
R1#
ping 192.168.2.30
 |
| Unsuccessful Ping Verification |
Note:
In the ping result, the "U"
shows an ICMP inaccessible message.
R1#
telnet 192.168.2.30
 |
| Unsuccessful Telnet Ping Verification |
R1#
R1#ping
 |
| Successful Ping Verification |
R2#sh
access-lists
 |
| Standard Access-Lists Status |
R2#
 |
| Removing Standard Access-Lists |
R1# ping 192.168.2.30
 |
| Successful Ping Verification |
R1#
telnet 192.168.2.30
 |
| Successful Telnet Ping Verification |
R2#
Search
Tags
- What is Standard ACL
- Configuring standard ACLs
- How to Configure Standard
ACL
- Standard ACL configuration in
packet tracer
If you want to configure Named ACL and Extended ACL then visit below link: 👇


0 Comments